Translate

Wednesday, April 9, 2014

How To Shoot A Liquid Flow - DIY Photography


HOW TO SHOOT A LIQUID FLOW

Just for the 4th of July, we thought to show you how to make a different kind of fireworks, the liquid kind.

If you liked Corrie White's how to shoot water drops tutorial, you are going to love her how to shoot a liquid flow tutorial (it's this tutorial :).

Primary Plumes

And here is how it goes

Preparation and Materials

I use a small plastic 5 liter aquarium filled to 3 cm. from the top with water. Only an area of about 8 cm. wide is used to take the pictures. After filling the tank with cold tap water, I wipe the front of the tank with a bundle of pipe cleaners to clean any bubbles sticking to the inside of the tank in the drop zone. Then I let the water settle for a couple of minutes to allow the tiny bubbles to dissipate. On the inside of the back of the tank I have some black plastic for the background which also stops any flash glare on the tank itself.

Above and Below

I usually use table cream mixed with some food dye. Sometimes I will use a bit of acrylic paint but I prefer the cream. I have a thin wire across the top of the tank to mark the area of focus in the drop zone. I dip a marker or ruler into the water to use as a focusing aid. The tank sits on a small cardboard platform with some raised markers so I can reposition the tank in the same spot after each cleaning without having to refocus each time. I prefer to have the camera at a very low angle to the tank so that I can include the surface of the water in the shot. I use medicine droppers and have the cream mixture in shot glasses. I use three flash guns for these. One from the top and two on the front corners. They are triggered by wireless on my Canon 7D camera.

White Plume

The Process

When I'm ready, I drop a small drop of cream into the water and take a couple of shots of the single drop. Then I will use various colors and sometimes drop two colors simultaneously for which I have to tape my shutter button to the floor and trigger it with my foot. Lately, I have been using three droppers with primary colors to get a nice color blend effect. For the plumes, you need to give the dropper a good squeeze. You only get a few shots before the water is too cloudy for any good keepers and the process starts all over.

Set-up for Cream Drops with a base.

For the ones with the splash on the surface with the flow under the water, I fill the tank only half full. The first drop is discarded, but the second one will show the flow underneath. Quite often I will drop a couple of drops of cream into the water, then trigger the splash to fall on top of these. For these shots I will use a delayed flash to light up the action in the water. Also, for these I will use colored gels on the flash guns. Two or three shots and it's clean up time again.

Mint With a Scoop of Strawberry

Post

I like a clean background so I do a lot of clean-up. The water is often cloudy so I clean this up as well as any bubbles that get left in the tank. On all my shots, I rotate the picture 180 degrees so it looks like the flow is moving upwards. Just my preference. Some of the liquid flow shots are suitable for the mirror and flip process. There is a simple tutorial for this here.

The Sacrifice

These are a lot of work but I love the outcome. Definitely not for the impatient!!

About The Author

Corrie White is a photographer based in Ontario, Canada. She shoots breath taking water drops and other water inspired photographs. You can watch her art on her Flickr stream, on her site, or follow her on Facebook.


Tuesday, April 1, 2014

A First Look at Darktable, an Open Source Alternative to Lightroom


A First Look at Darktable, an Open Source Alternative to Lightroom

When it comes to image management programs, the undisputed kings are of course Lightroom and Aperture. Both of these programs have been around for some years and are slick, efficient and fast. They do however cost money, significantly less these days than in their original versions but none the less in these days of global austerity not every photographer will be able to justify the purchase of them. There is however an extremely powerful open source image management program available to Linux and Mac OSX users, Darktable. Open source is free software that is open to further development by outside programmers and as such Darktable has evolved into a very good, free image management program. Darktable can be downloaded from here: http://www.darktable.org


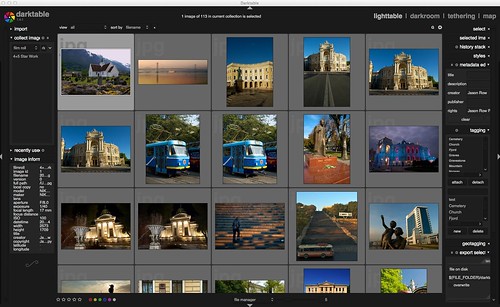
Darktable's well designed interface by Jason Row Photography, on Flickr

Initial Impressions

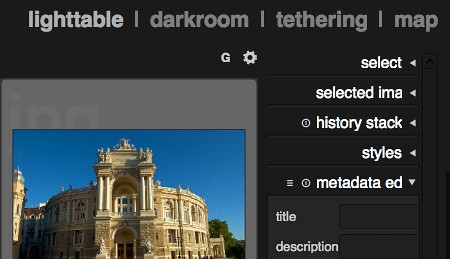
When I first opened Darktable, I was surprised at how clean and well designed it was. The interface whilst not as slick as it's payware cousins, is none the less easy to understand and well laid out. Inspiration is obviously taken from Lightroom's interface with the use of modules at the top right. These are: Lighttable, this is the catalogue viewing section of the program; Darkroom, like the Develop module in Lightroom, is the image processing area; Tethering, which is self explanatory, and Map, like Aperture's map function, allows you to manually geotag your image.


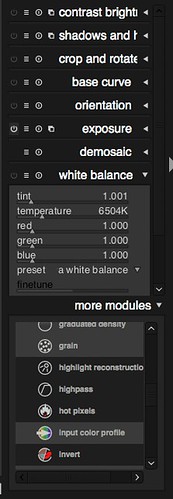
The modules tab by Jason Row Photography, on Flickr

Modules in Darktable

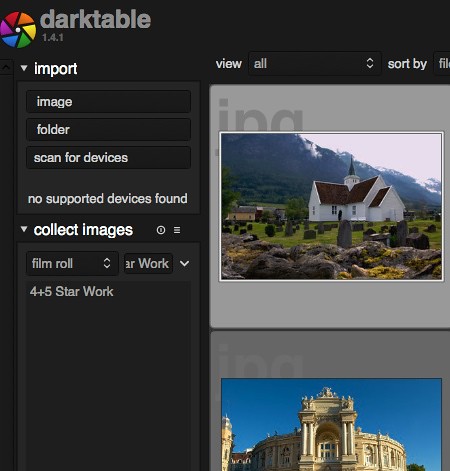
Lighttable: Lighttable is where the program initialises. To the left of the screen you will see the import dialogue, this allows you to import a single image, a folder of images or to scan for an imaging device. When you import, Darktable just references images in their current location or if you import from a device you will be asked to define a destination folder. Once imported your folder will appear in the next section down, the collect images section. This is your catalogue hierarchy and allows you to create and organise collections around multiple criteria. At the bottom left of the Lighttable module there is metadata information about the image selected in the main catalogue.


The import window by Jason Row Photography, on Flickr

To the right of the Lighttable module we have the ability to add metadata such as description, creator and rights as well as tagging the image. Tagging is the Lighttable equivalent of keywording. At the very bottom is the export dialogue which is a little clunky to use and does not appear to allow exporting of the original image such as a RAW file.

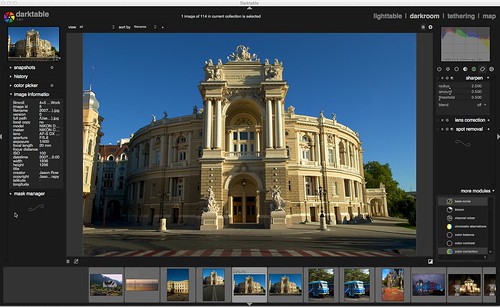
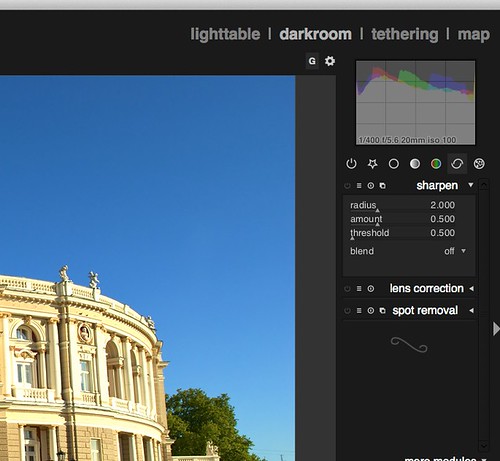
Darkroom: Double clicking on any image in the Lighttable module will automatically open it in the Darkroom module. This is actually surprisingly powerful with many of the tools found on its payware equivalents. The left side of the screen displays basic image information but the heart of the Darkroom module is to the right. At the top right is a largish histogram which you can click on and drag to adjust the white and black levels. Below this a series of small icons reveal different levels of adjustment tools. The choice is surprisingly  comprehensive and includes tone curves, shadow and highlight adjustment, a white balance control with individual RGB channels, sharpening and even a basic automatic lens correction tool. As well as these there are spotting tools, vignetting and graduated filters. As you would expect all of this tools make their adjustments non destructively, the integrity of the original image is maintained and the adjustments only applied in the program itself or when exporting as a new image. Overall the adjustments seem to be applied very quickly and without any discernible lag.


The darkroom interface by Jason Row Photography, on Flickr


Editable histogram and other tools by Jason Row Photography, on Flickr


Many post production tools are on offer by Jason Row Photography, on Flickr

Tethering: The tethering module allows you to shoot images directly to your computer via a USB cable attached to your camera. The image can be previewed live on your computer screen and certain elements of the camera control can be changed from the computer. Digging into Darktable's manual I could not immediately find a list of supported cameras but there was a command line tool to determine if your camera is compatible. 

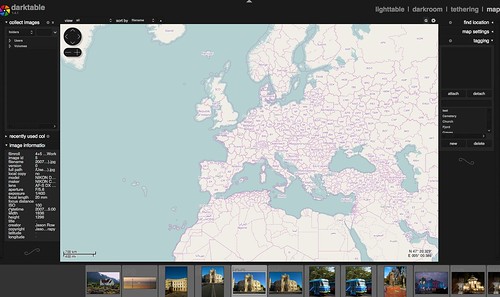
Map: The map tool allows you to geotag selected images on a map. Darkroom appears to use OpenStreetMap for its mapping, which whilst not as visually appealing as Google Maps, still gives you good location details for most parts of the world. To the right of the map module are map setting and another option for tagging the image. 


The map module for geotagging] by Jason Row Photography, on Flickr

Settings: Unlike the polished Windows and Mac apps we are used to, the settings menu in Darktable is a little clunky to use and initially difficult to find. It is in fact a small gear icon below the modules section which opens a dedicated preferences window. It is here that Darkroom loses some of the slickness of its interface, falling back into complicated, unclear options. 

Overall Darktable is an extremely powerful tool for those photographers on a limited budget. Its limitation is that it works only on Linux or OSX however, Linux is a free operating system and much easier to install than before. You can also run Linux virtually through a virtual machine on Windows.

Whilst not a slick as Lightroom or Aperture, Darktable offers many of the facilities of those products for the price of free. For that reason alone, I would have to recommend it.

Leave a Comment